With TikTok getting banned in many regions, Instagram Reels has become a go-to choice for watching shorter, unique videos for free. If you are an Instagram influence, you may want to save songs on Instagram at some point. Maybe you were watching the Reels and came across a song/music you want to use on your own video. The latest version of Instagram has a feature that lets you save or share music from Instagram Reels. Hence, in this article, we will share a step-by-step guide on how to save songs on Instagram. Let’s get started.
How to Save Songs on Instagram?
If you want to save songs on Instagram, follow some simple steps below. You can only save songs that were available on the Reels videos.
Open the Instagram app on Android/iPhone and switch to the Reels tab.
Next, open the Instagram Reels and tap on the name of the audio track. You will find it just beside the Reel’s caption.
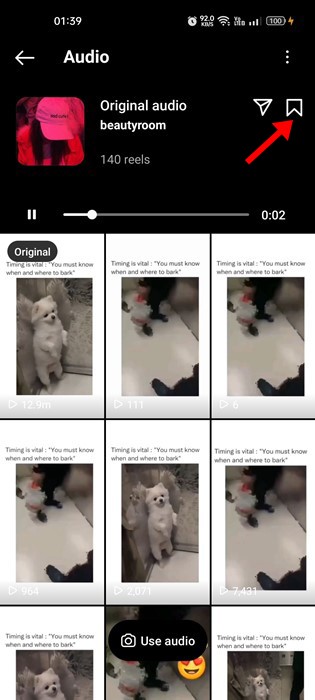
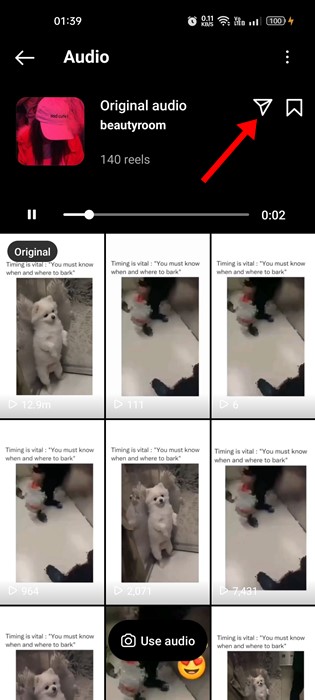
On the Audio page, you will see all the Reels that use the same audio. To save the music, tap the Save icon at the top-right corner.
That’s it! This is how you can save music on Instagram. First, you must repeat the steps for every music/song you want to save from the Instagram Reels videos. Then, using the Music Sticker, you can also use these songs on your Instagram stories. Please note that the music you will save isn’t saved on your device; It’s saved on the app. Hence, if you clear the app cache & data, your saved music will be lost.
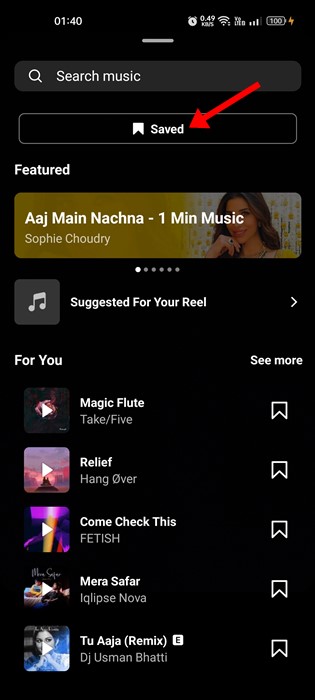
How to find saved audio on Instagram?
Instagram provides you with a dedicated option to find all your saved audio. So, if you want to find saved audio on Instagram, follow the steps we have shared below.
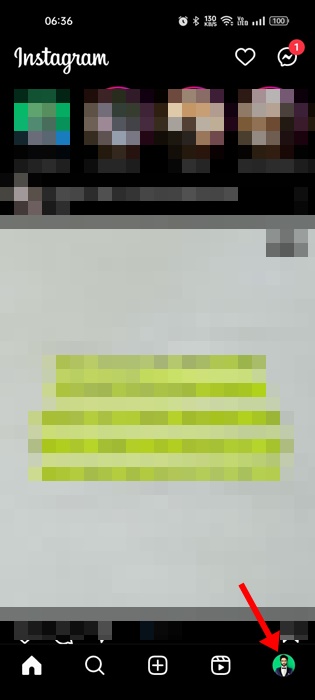
Open the Instagram app on your device.
Next, tap on your profile picture at the bottom-right corner.
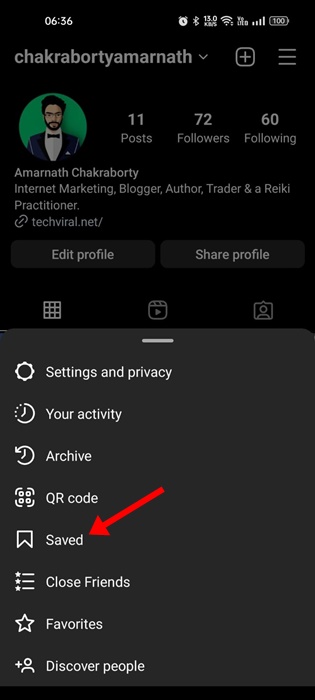
This will open the profile page. Tap on the hamburger menu at the top-right corner.
From the menu that appears, select ‘Saved‘.
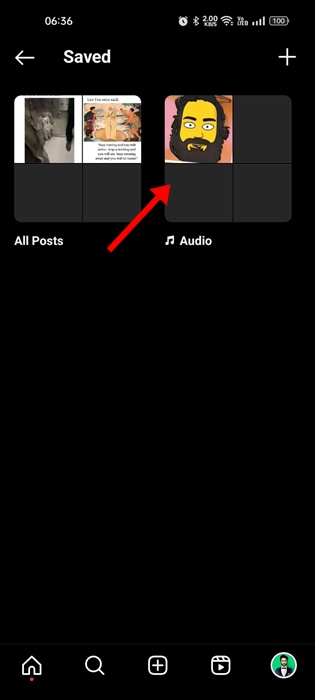
On the Saved, select ‘Audio‘
Now, you will find all your saved audio on Instagram.
That’s it! That’s how easy it is to find saved audio on the Instagram app.
How to Share Music on Instagram?
If you want to share Instagram music with any of your friends, you can also do that. To share music on Instagram, you need to follow these simple steps.
Open the Instagram app on Android/iPhone and switch to the Reels tab.
Next, open the Instagram Reels and tap on the name of the audio track. You will find the audio track under the creator’s name.
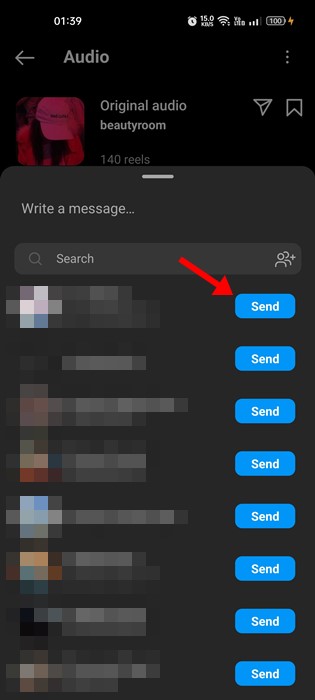
On the next screen, you will see all the Reels that use the same audio. To share the music, tap on the Share icon, as shown below.
On the Share option, tap the Send button next to the person you want to share the music with.
That’s it! This is how you can share songs on Instagram in easy steps. You can share your favorite music with your friends to help them create more amazing videos.
How to Add Saved Songs on Instagram?
We understand you want to save songs on Instagram to use them on your video. So, here are the steps that will let you add saved songs to your Instagram Reels.
First, open the Instagram app on your Android or iPhone.
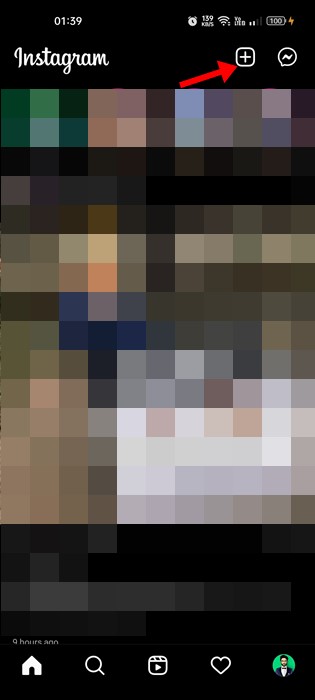
When the Instagram app opens, tap the (+) button and select ‘Reel’.
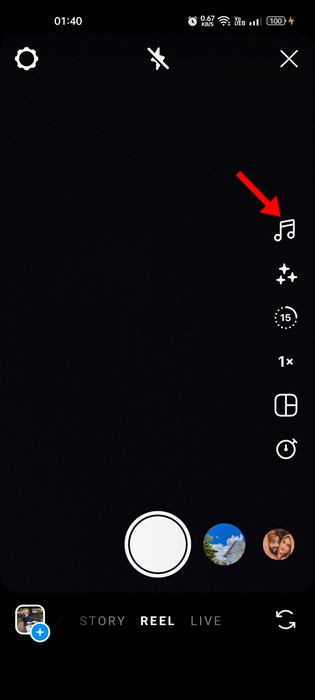
On the Reel creator, tap the audio icon in the right sidebar.
Next, tap the Saved button on the Audio screen, as shown below.
Here, you will find all your saved music on Instagram. Simply tap on the audio and start creating your Reels video.
That’s how easy it is to add saved music to your Instagram Reels. You can save as many songs/music as you want on your Instagram by following the steps we have shared.
How to Remove Saved Songs on Instagram?
Removing the songs you have saved before is best to keep your saved library clear from all mess. Here’s how to remove saved songs on Instagram.
First, open the Instagram app on your smartphone and tap on the (+) button at the top-right corner.
On the next screen, switch to the Reels tab at the bottom.
On the Reel creation screen, tap the Audio icon at the right sidebar.
When the audio pane opens, tap on Saved.
On the next screen, you will find all your saved music. You need to tap the Save button next to the music/song name to remove them.
That’s it! This is how you can remove a saved song from Instagram. You must repeat the same steps for every piece of music you want to remove. Since Instagram doesn’t save music on your phone, the storage issue won’t be a problem, and you can save as many songs as you want. Also read: 20 Best Instagram Tips & Tricks So, this guide is all about how to save songs on Instagram. There’s no option to save audio from the Instagram Reels on the web version. Therefore, you need to rely on the mobile app only to save songs on Instagram. If you need more help saving songs on Instagram, let us know in the comments below.